Does your wall look dull and boring? You’re not alone. Most people move into a home and just, you know, leave the walls blank. It can feel like too much, and it’s hard to know where to start.
But here’s the good news: You don’t have to be an interior designer. You don’t need a large budget, either. With the right tactics, you can have a wall that makes people say “wow” when they walk in.
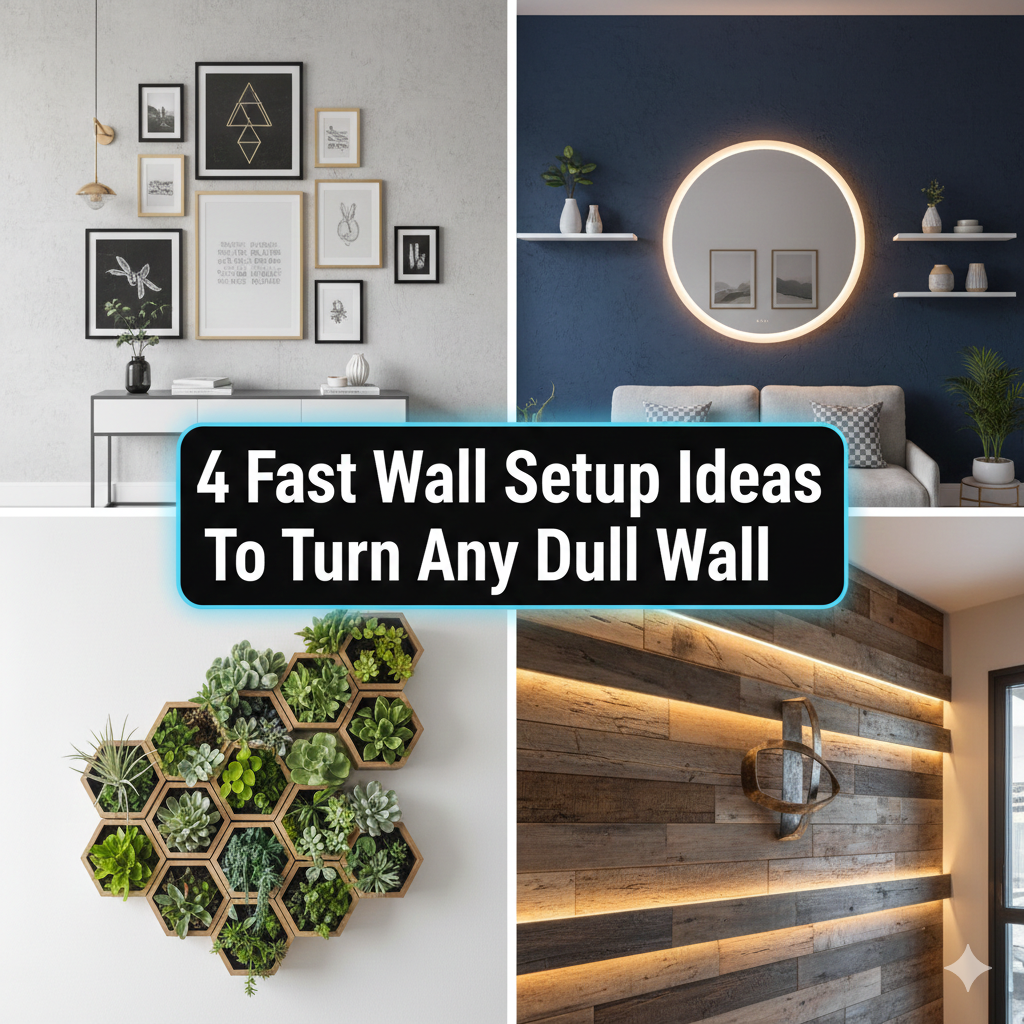
In this guide, we discuss 4 fast wall setup ideas that are inexpensive, simple, and actually work. There’s something here for you, whether you’re in an apartment you rent or a house that’s yours.
Let’s get into it.
Why You Should Care More About Your Walls Than You Do
Walls occupy an enormous amount of visual real estate in any room. But while most people are concerned with furniture, rugs, and lighting — they completely ignore the walls.
Here’s a simple fact: A well-decorated wall can turn a small room into a feeling of largeness, a dark room into brightness, and a plain room into something out of the pages of an art or design magazine.
Walls set the mood. They tell your story. And the best part? It shouldn’t take weeks or cost a fortune to change them.
Interior design studies consistently show that vertical space — your walls — has one of the highest visual impacts in any room. But it is the biggest underused design opportunity in most homes.
So if you’ve been stalling on hanging art, now is your moment.
What Makes a Wall Setup “Fast”?
Before we dive into ideas, let’s clarify what “fast” actually means in this context.
A quick wall setup is one that is:
- Complete within a weekend or less
- Needs only basic tools (no heavy drilling or building)
- Uses materials that can easily be found at stores or online
- Interchangeable or removable with minimal damage
Each of the four ideas in this article fulfills these criteria. Some can even be completed in an afternoon.
Idea #1 — The Gallery Wall (Done Right, Done Fast)
What Is a Gallery Wall?
A gallery wall is a set of frames, pictures, prints, or pieces of art placed together on one wall. It’s one of the most popular wall setups — and with good reason. It looks costly, feels intimate, and fits in almost every room.
The problem that most people face? They overthink it. They spend weeks attempting to get the layout just right. Then they give up.
Here’s how to do it better, faster.
How to Create a Gallery Wall in a Day
Step 1: Pick your theme. Decide on a direction before buying anything. Some popular options:
- Black and white family photos
- Travel prints and maps
- Botanical illustrations
- Different styles of art in the same color palette
Step 2: Choose your frames. Use one or two frame colors for a clean appearance. Black frames are timeless. Natural wood gives the feeling of warmth and comfort. Use different sizes, but keep the same colors.
Step 3: Dry fit on the floor first. Lay all your frames on the floor before you hammer a single nail. Keep rearranging until you love it. Take a photo for reference.
Step 4: Hang from the center out. Place the biggest piece first in the middle. Build outward from there. Keep spacing between frames the same — about 2 to 3 inches is ideal.
Step 5: Use painter’s tape for a stress-free process. Trace each frame on painter’s tape. Place the tape on the wall to preview your layout. Adjust before committing. That way you’re not patching extra holes later.
Gallery Wall at a Glance
| Element | Recommended Option | Budget Range |
|---|---|---|
| Frame colors | Black, white, or wood | $5–$30 per frame |
| Spacing between frames | 2–3 inches | — |
| Ideal wall size | 4 ft wide or larger | — |
| Time to complete | 3–6 hours | $50–$200 total |
| Best rooms | Living room, hallway, bedroom | — |
Pro Tips for a Faster Gallery Wall
- Purchase pre-arranged gallery wall kits from stores like IKEA or Target — they come with matching frames.
- Use adhesive strips like Command strips instead of nails if you’re renting.
- Don’t stress about perfection. Spacing with slight variations looks more organic.
Idea #2 — Peel-and-Stick Wallpaper or Wall Murals
The No-Commitment Wall Makeover
This is one of the quickest and most striking ways to alter a wall. Peel-and-stick wallpaper has come a long way. Earlier, it seemed cheap and fell off quickly. Now? It looks great and holds up well.
Wall murals go even one step further. You can cover an entire wall in a forest scene, city skyline, marble texture, or abstract design — and do it all in one afternoon.
This is a particularly good option for renters. It goes up without damaging the wall, and peels off cleanly when you move out.
How to Apply Peel-and-Stick Wallpaper
What you’ll need:
- Rolls of peel-and-stick wallpaper or a wall mural panel set
- A squeegee or credit card
- A level or measuring tape
- Scissors or a craft knife
Step-by-step process:
- Clean your wall. Wipe off dust and grease. Let it dry completely. This is crucial — the adhesive won’t adhere properly to a dirty wall.
- Measure and cut. Measure your wall height and cut the panels a few inches longer than needed. You’ll trim the excess after.
- Start from one edge. Peel the backing slowly as you go. Don’t peel it all at once — it will stick to itself and be a nightmare.
- Smooth as you go. Use a squeegee or even your hand to smooth out any bubbles as you move down. Work slowly and methodically.
- Line up patterns carefully. If your wallpaper is patterned, align the edges of each strip before pressing down.
- Trim the edges. Once the panel is up, trim top and bottom with scissors or a craft knife.
Best Peel-and-Stick Styles for Different Rooms
| Room | Best Style | Effect It Creates |
|---|---|---|
| Living room | Marble or abstract | Luxurious and modern |
| Bedroom | Nature mural or soft floral | Calming and cozy |
| Home office | Geometric or brick | Focused and stylish |
| Kids’ room | Cartoon or space theme | Fun and imaginative |
| Bathroom | Tropical or tile pattern | Fresh and vibrant |
Common Mistakes to Avoid
- Skipping wall prep. A dirty or textured wall will cause peeling. Always clean first.
- Rushing the alignment. Take your time on the first strip. It sets the direction for everything else.
- Buying too little. Always order 10–15% more than your wall measurement. Patterns require overlap.
Idea #3 — Floating Shelves as a Wall Feature
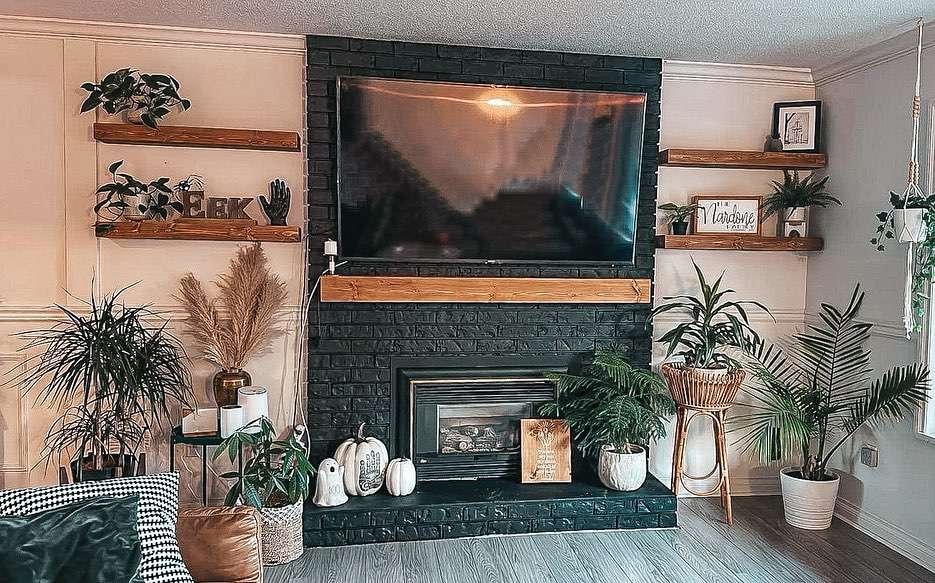
When Shelves Become Decoration
Most people think of shelves as storage. And yes, they are. But when styled properly, floating shelves become a full wall feature. They add dimension, depth, and personality to any wall.
Of the 4 fast wall setup ideas, this is one of the most functional because it gives you storage and style at the same time.
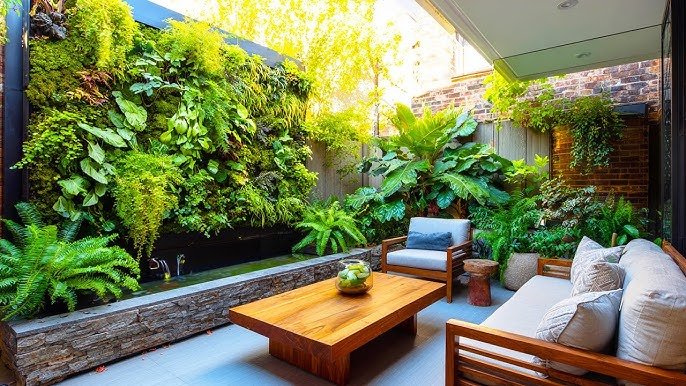
If you love bringing nature indoors, you can style your shelves with trailing vines, small succulents, or herb pots — a great idea for those who also enjoy small balcony gardening and compact green spaces.
Choosing the Right Shelves
Not all shelves are made the same. Here’s what to look for:
- Material: Wooden shelves are warm and natural. White shelves are clean and minimal. Black shelves are bold and modern.
- Depth: Deeper shelves (8–10 inches) hold books and plants. Shallower shelves (4–6 inches) are perfect for small décor.
- Length: Longer shelves have a greater visual impact. One long shelf can feel more dramatic than three small ones.
How to Style Floating Shelves Like a Designer
The secret is balance. Here’s a simple formula:
Use the rule of three. Group items in odd numbers — three objects look more natural than two or four.
Vary the height. Pair tall items (like a vase or candle) with medium items (books, small plants) and flat items (framed photos, small trays).
Leave breathing room. Don’t pack shelves wall to wall. The space around objects is just as important as the objects themselves.
Add something living. A tiny plant or small succulent instantly makes shelves feel refreshing and alive.
Shelf Styling Ideas by Room
| Room | Shelf Contents | Vibe |
|---|---|---|
| Living room | Books, candles, art prints, trailing plants | Cozy and curated |
| Kitchen | Jars, cookbooks, small herbs | Functional and charming |
| Bedroom | Bedside lamp, journal, crystals, small framed photos | Peaceful and personal |
| Home office | Books, organizers, small cactus, motivational print | Productive and inspiring |
| Bathroom | Rolled towels, candles, small plants | Spa-like and calm |
Installation Tips for Speed
- Use a stud finder before drilling. Anchoring into studs gives you a much stronger hold.
- Many floating shelf kits come with hardware included. Read the instructions before starting.
- If you’re a renter, look for heavy-duty adhesive shelf brackets that don’t require drilling. They work great for lighter shelves.
- Install two or three shelves in a vertical arrangement on one wall for maximum impact.
Idea #4 — Accent Walls With Paint, Panels, or Fabric
The Single-Wall Transformation
An accent wall is one wall in a room that looks different from the rest. It’s a design trick that draws the eye, adds depth, and makes the room feel more intentional.
The beauty of an accent wall is that you only have to work on one wall — not four. That alone cuts your time and effort dramatically.
There are three main ways to create an accent wall quickly. Each one has a different look and price point.
Option A: Paint an Accent Wall
Paint is the most classic and traditional option. It’s cheap, fast, and makes a huge difference.
Choose a color that contrasts. If the rest of your room is neutral (white, beige, gray), go for a deep color — navy, forest green, terracotta, or charcoal.
How fast can you do it? With proper prep, one accent wall can be painted in 2–4 hours.
Quick paint checklist:
- Painter’s tape along edges and trim
- A roller for large areas and a small brush for corners
- At least two coats for full coverage
- Let each coat dry before adding the next
Option B: Wood Slat Panels or Shiplap
Wood panels are hugely popular right now. They add texture, warmth, and an upscale look to any wall.
You can buy pre-made wood slat panel kits online or at home improvement stores. Many of them peel and stick — no nails required.
What they look like: Thin strips of wood (or faux wood) arranged horizontally or vertically across the wall. Sometimes painted, sometimes left natural.
Time to install: A full wall can be done in 4–6 hours with a kit.
Cost range: $80–$300 depending on wall size and material quality.
Option C: Fabric Wall Panels
This is a lesser-known but incredibly fast option. Fabric panels can be made from any fabric you love — a bold print, a texture, a color.
How it works:
- Stretch fabric tightly over a wooden frame (like a large canvas).
- Hang on the wall like artwork.
- Multiple panels placed together create a full accent wall effect.
This works brilliantly in bedrooms and home offices. It also adds subtle soundproofing, which is a bonus if you’re in a noisy apartment.
Accent Wall Comparison Chart
| Method | Time to Complete | Cost | Renter-Friendly? | Skill Level |
|---|---|---|---|---|
| Paint | 2–4 hours | $20–$60 | Depends on lease | Easy |
| Wood slat panels | 4–6 hours | $80–$300 | Yes (peel & stick) | Moderate |
| Fabric panels | 2–3 hours | $30–$150 | Yes | Easy |
| Peel-and-stick mural | 2–4 hours | $40–$200 | Yes | Easy |
How to Pick the Right Wall Setup for Your Space
With four great options, it can be tough to choose just one. Here’s a simple way to decide:
Ask yourself these questions:
- Am I renting or do I own? If renting, stick with peel-and-stick, fabric panels, or Command strip gallery walls.
- What’s my budget? Gallery walls and fabric panels can be done cheaply. Wood panels and murals cost more but look luxurious.
- How much time do I have? Got just an afternoon? Try peel-and-stick wallpaper or a small gallery wall. Have a full weekend? Opt for floating shelves or a painted accent wall.
- What’s the room used for? Bedrooms benefit from calming murals or soft gallery walls. Home offices love bold accent walls. Living rooms shine with floating shelves or gallery walls.
- What’s my style? Modern and minimal? Go for wood slat panels or a clean painted accent. Cozy and eclectic? Gallery walls and layered shelves are your best friends.
Quick Comparison: All 4 Fast Wall Setup Ideas
| Wall Setup Idea | Best For | Time Needed | Budget | Renter-Safe |
|---|---|---|---|---|
| Gallery Wall | Personal style, any room | 3–6 hours | $50–$200 | Yes (with strips) |
| Peel-and-Stick Wallpaper | Dramatic makeovers | 2–4 hours | $40–$200 | Yes |
| Floating Shelves | Storage + style | 2–5 hours | $30–$150 | Mostly yes |
| Accent Wall | Bold focal point | 2–6 hours | $20–$300 | Depends on method |
Mistakes People Make With Wall Setups (And How to Avoid Them)
Even with the best ideas, things can go wrong. Here are the most common mistakes and how to skip them entirely:
Mistake #1: Hanging things too high. Most people place art and shelves too high on the wall. The center of your art or shelf should be at eye level — around 57 to 60 inches from the floor.
Mistake #2: Going too small. One tiny frame on a large wall looks lost. Go bigger, or cluster smaller pieces together.
Mistake #3: Ignoring wall prep. Whether you’re painting or applying wallpaper, skipping wall cleaning leads to peeling and poor results. Always prep first.
Mistake #4: Matching everything too perfectly. Rooms that are too “matchy-matchy” can feel stiff and boring. Mix textures, finishes, and sizes for a more natural look.
Mistake #5: Not measuring. Measure twice, hang once. Use a level. It takes two extra minutes and saves hours of frustration.
FAQs About Fast Wall Setup Ideas
Q: Can I do these wall setups in a rented apartment? Yes! Gallery walls using Command strips, peel-and-stick wallpaper, and fabric panels are all renter-friendly. Always check your lease first, and remove everything carefully when moving out.
Q: Which wall setup idea is the cheapest? A painted accent wall is the most affordable, often costing under $30. A small gallery wall with budget frames comes in a close second.
Q: How do I make a small wall look bigger? Use light colors, vertical lines, or a large mural with depth (like a forest or sky scene). Mirrors in gallery walls also make a space feel larger.
Q: Does peel-and-stick wallpaper really stay on? Yes, modern versions are reliable — especially on smooth, clean walls. Avoid textured or damp walls. Good brands like NuWallpaper or RoomMates are well-reviewed and last for years.
Q: How many shelves should I put on one wall? Two to four shelves create a balanced look. Odd numbers (one, three, five) tend to look more natural. A spacing of 12 to 16 inches between shelves is a good starting point.
Q: What is the easiest wall setup for a complete beginner? Peel-and-stick wallpaper or a simple gallery wall with Command strips. Both require minimal tools and no special skills.
Q: How do I choose the right wall in my room for a feature wall? Choose the wall you naturally look at when you enter the room. That’s usually the wall facing the door, or the wall behind a sofa or bed.
Conclusion: Your Walls Deserve Better
Your walls are possibly your greatest design asset in the home — and they’ve probably been neglected for too long.
With these 4 fast wall setup ideas, you now have everything you need to truly make an impact. There’s no one to hire. You don’t need to break the bank. You only need a plan, an afternoon, and a little confidence.
Start with one wall. Choose the idea that most excites you. Gallery wall, peel-and-stick mural, floating shelves, or a bold accent wall — any one of them will change your space more than you expect.
The best wall setup is the one you actually do. So pick your wall, and get started.