I killed three basil plants before I figured out I was watering them way too much.
No one told me that soggy roots are basically a death sentence for most herbs. I just assumed more water meant more love. Spoiler: plants don’t work that way. After those three very sad basil funerals, I started actually paying attention — reading, experimenting, asking other gardeners embarrassing questions — and slowly, things started to click.
If you’re just starting out with balcony or container gardening, this one’s for you. These five hacks aren’t pulled from a textbook. They’re the things I genuinely wish someone had told me before I wasted money on pots, soil, and seeds that went nowhere.
1. Stop Guessing with Water — Use the Finger Test
This sounds almost too simple, but it changed everything for me.
Before you water anything, stick your finger about an inch into the soil. If it feels moist, walk away. If it’s dry, water it. That’s it. That’s the whole system.
Most beginners (myself very much included) water on a schedule — every morning, every two days, whatever feels right. The problem is that plants don’t care about your calendar. They care about what’s actually happening in the pot. A hot, windy day dries soil out fast. A cloudy, humid week means your plant might not need water for four or five days.
Overwatering is actually the number one reason beginner plants die. It causes root rot, which you usually can’t see until it’s too late. The leaves start yellowing, the plant looks “sad,” and you assume it needs more water. So you water more. And it gets worse.
What to do instead:
- Check soil moisture before every watering session, not after a fixed number of days
- Water deeply (until it drains from the bottom) rather than a little splash every day
- Make sure your pots have drainage holes — this is non-negotiable
- In summer heat, check once a day. In cooler months, every two to three days is usually fine
Once I switched to the finger test, I stopped losing plants to overwatering almost immediately. It felt like I’d unlocked a cheat code.
2. Feed Your Soil, Not Just Your Plants
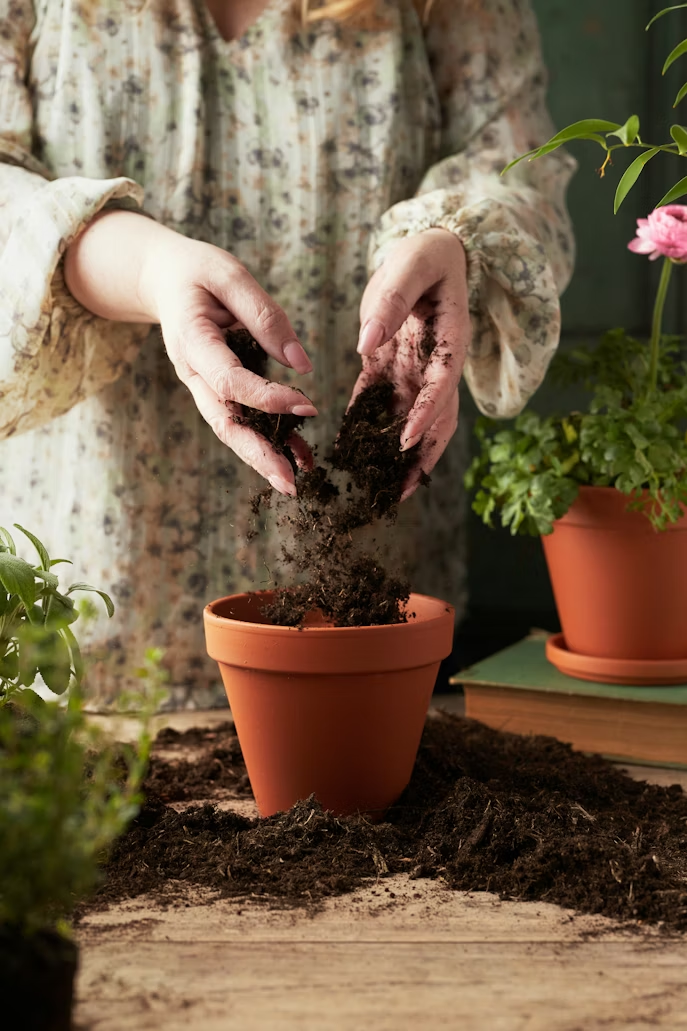
Here’s something that took me an embarrassingly long time to understand: the secret to healthy plants isn’t fancy fertilizer or expensive seeds. It’s the soil.
Bad soil = struggling plants, no matter what you do on top of it.
When I first started, I bought whatever bag of potting mix was cheapest at the hardware store. The plants grew, technically, but they were weak, slow, and prone to every bug and disease that wandered past. A friend who had been gardening for years took one look at my pots and said, “Your soil looks dead.”
She was right. It was hard, dense, and had zero life in it.
Good container soil should feel light and fluffy. It should hold some moisture but still drain well. And it should have organic matter — compost, worm castings, coconut coir — mixed in to give your plants actual nutrition.
A basic soil mix that actually works:
| Ingredient | Purpose | Ratio |
|---|---|---|
| Quality potting mix | Base structure | 50% |
| Compost or worm castings | Nutrients + microbial life | 25% |
| Perlite or coarse sand | Drainage + aeration | 25% |
You can buy all three of these from any garden center for pretty cheap. Mix them together and you’ve got a growing medium that gives your plants a genuine head start.
If you want to go deeper on this, the folks at 8 Ultimate Soil Mix Tips Every Gardener Needs to Know break it down really well — I actually bookmarked that page when I was first sorting out my soil problems.
3. Start With the Right Plants (Not the Prettiest Ones)
I made this mistake my very first season. I went to the nursery, got completely overwhelmed by all the beautiful options, and came home with tomatoes, peppers, eggplant, and a jasmine vine — none of which were appropriate for my tiny, partly shaded balcony.
The tomatoes gave me five fruits. The peppers gave me two. The eggplant just sat there, confused and unhappy. The jasmine was the only thing that thrived, which I hadn’t even planned to eat.
Lesson learned: match the plant to your actual conditions, not to your wishlist.
Before you buy anything, spend a few days observing your space. Ask yourself:
- How many hours of direct sun does this spot get? Most vegetables need 6+ hours. Herbs can often manage with 4.
- How exposed is it to wind? High-rise balconies can be brutal. Fragile plants won’t survive.
- How much space do you actually have? A tomato plant needs a big, heavy pot. Radishes can grow in a shallow window box.
For beginners with limited space, some genuinely forgiving starter crops include:
- Lettuce and salad greens — fast-growing, shallow-rooted, tolerates partial shade
- Radishes — ready in 3–4 weeks, almost impossible to mess up
- Green onions/scallions — grow in almost any container, even a repurposed can
- Cherry tomatoes — much easier than big beefsteak varieties
- Basil and mint — great for beginners (just don’t overwater the basil, trust me)
If you want a proper list with details on each one, check out 7 Easy Crops for Beginners That Will Really Grow — No Green Thumb Needed — it covers exactly what to expect from each plant and how to get them started right.
4. Go Vertical Before You Run Out of Space
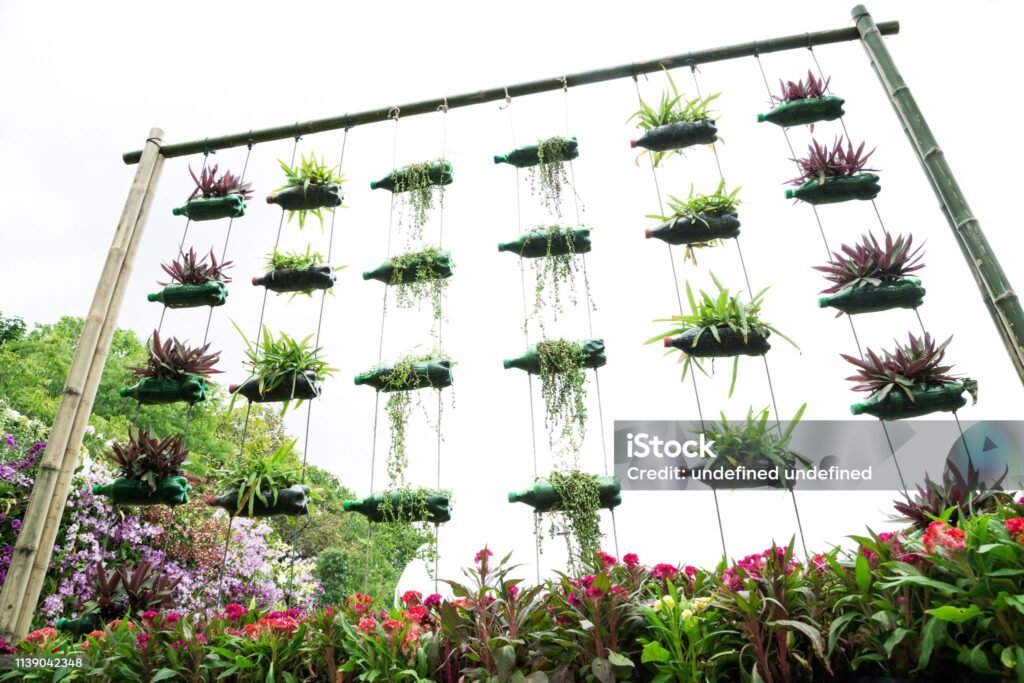
This is the hack that genuinely transformed my balcony. I had about 12 square feet of floor space to work with. I thought I could maybe fit four or five pots. Then someone showed me a photo of their vertical wall garden and I had one of those “why didn’t I think of that” moments.
Going vertical means growing up instead of out — using your wall space, railings, and height to multiply your growing area without adding any footprint.
There are a few easy ways to do this:
Railing planters — These hook directly onto balcony railings and are perfect for herbs, strawberries, or trailing plants. No drilling required.
Pocket planters / felt wall gardens — Fabric pockets that mount on walls. Each pocket holds one plant. A single panel can hold eight to twelve plants in the space of a picture frame.
Tiered shelving — A simple three-tier plant stand gives you three times the growing space in one footprint. You can find these at IKEA or any garden store pretty cheaply.
Trellises — If you’re growing climbers like beans, cucumbers, or even some tomato varieties, a trellis lets them grow up instead of sprawling sideways.
The trick with vertical gardening is to think about sunlight distribution. Put your tallest plants at the back or top, and shorter or shade-tolerant ones lower down so nothing blocks light from everything else.
For layout inspiration that really makes you rethink your space, 10 Balcony Layout Ideas for a Smarter Outdoor Space has some genuinely clever setups worth looking at — especially if you’re working with a weird-shaped or very narrow balcony.
5. Learn to Read Your Plants (They’re Telling You Everything)
This last hack isn’t really a tool or a technique. It’s a mindset shift, and honestly it might be the most valuable thing on this list.
Plants communicate through their leaves, their color, their growth rate, and even the way they droop. Once you start noticing these signals, you stop reacting to problems after they’ve gotten serious and start catching them early — when they’re easy to fix.
Here’s a quick visual reference:
| What You See | What It Usually Means |
|---|---|
| Yellow leaves (lower, older leaves) | Overwatering or nitrogen deficiency |
| Yellow leaves (whole plant) | Root rot or waterlogged soil |
| Brown leaf tips | Underwatering, low humidity, or salt buildup |
| Pale, washed-out color | Not enough sunlight |
| Leggy, stretched stems | Reaching for more light (needs more sun) |
| Wilting in the morning | Underwatering |
| Wilting in the afternoon (with moist soil) | Heat stress — totally normal in summer |
| White crusty deposit on soil | Mineral/salt buildup from tap water |
| Tiny holes in leaves | Insect damage — check under leaves |
| Black spots or fuzzy growth | Fungal issue — improve airflow and reduce moisture |
None of this requires any experience to use. You just look, compare, and act.
The other part of “reading your plants” is slowing down when you’re in the garden. Don’t just water and walk away. Spend two minutes actually looking at your plants every day. Turn leaves over. Check the soil surface. Notice if anything looks different from yesterday.
Most problems — pests, disease, nutrient issues — are completely manageable if you catch them early. They become disasters when ignored for a week.
The Mistakes I Made So You Don’t Have To
Before I wrap up, here’s a quick honest list of beginner mistakes I made that I’d love for you to skip:
- Buying too many plants at once. Start with three or four. Get comfortable. Add more later.
- Skipping drainage holes. I once reused a decorative tin without drilling holes. Everything died within two weeks.
- Using garden soil in containers. It’s too dense, compacts badly, and doesn’t drain properly. Always use potting mix.
- Planting everything in one giant pot. Not all plants like the same water and light conditions. Keep them separated so you can care for each one individually.
- Giving up after one failure. I lost probably a dozen plants in my first year. That’s just part of the process.
Gardening has a learning curve, but it’s not a steep one if you’re paying attention. Every dead plant taught me something. Every thriving one felt like a genuine win.
One More Thing Worth Reading
If you’re still feeling a bit overwhelmed about where to even start, 10 Easy Wins for Beginners That Make Balcony Gardening Stick is a great next step — it’s focused specifically on building momentum early, which is really what makes the difference between people who give up after a season and people who are still at it three years later.